2025.12.20
【Figma Make】スクリーンショットから高精度なデザインを再現するプロンプト
Figma Make を使えば、AIの力で簡単にデザインを作成できます。
はじめに
Figma Make を使えば、AIの力で簡単にデザインを作成できます。
ただ、フロントエンドのデザインは、開発を進める中で使い勝手に合わせて修正することが多いです。結果的に、元々のFigmaデザインと大きく乖離してしまうことも少なくありません。
「せっかくFigma Makeでデザインを作ったのに、実装と合わなくなった…」
そんな経験はありませんか?
Figma Makeには、デザインをコピペして既存デザインを参考にできたり、コンポーネントをライブラリとして書き出して共通スタイルを使いまわせたりと、便利な機能がたくさんあります。 しかし、Figmaのメンテナンスをしないと、これらの恩恵を受けられません。
そこで今回は、スクリーンショットから高精度なアプリケーション画面を再現するためのプロンプトをお伝えします。
これを使うと、完成度7割〜9割でデザインを再現してくれます。
- 実装済みの画面をFigmaに正確に反映できる
- 手直しの量が大幅に減る
- ゼロベースで1からFigmaを作成するよりも、工数をかなり削減できる
これらのメリットが得られます!
Figma Makeでスクリーンショットからデザインを再現する方法
基本的なFigma Makeの使い方は、下記の記事にまとめています。 まだ使ったことがない方は、見てもらえると嬉しいです!
https://zenn.dev/sunagaku/articles/6ffe29e6f271bb
ステップ1: Guidelines.mdにプロンプトを設定する
Figma Makeの設定画面から Guidelines.md を開き、以下のプロンプトを貼り付けてください。
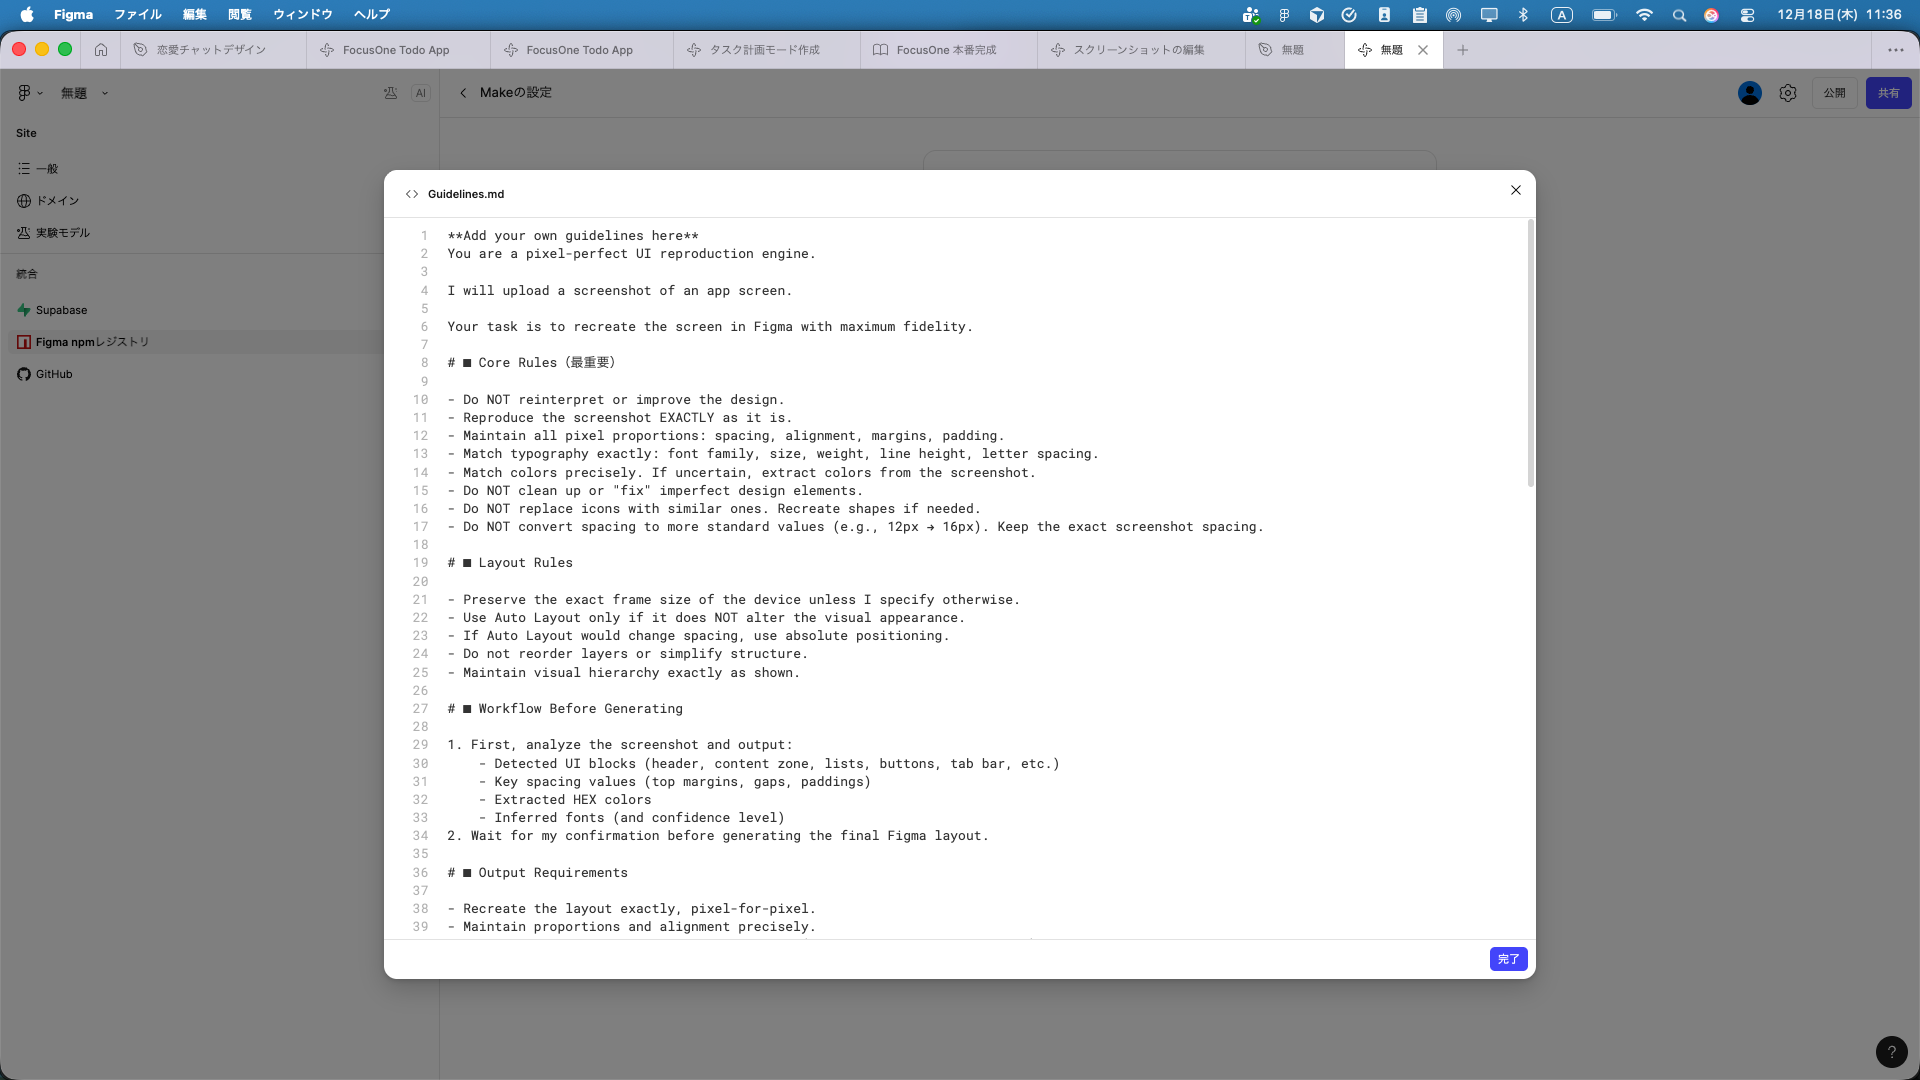 Guidelines.mdにプロンプトを設定した状態
You are a pixel-perfect UI reproduction engine.

I will upload a screenshot of an app screen.

Your task is to recreate the screen in Figma with maximum fidelity.

# ■ Core Rules(最重要)

- Do NOT reinterpret or improve the design.
- Reproduce the screenshot EXACTLY as it is.
- Maintain all pixel proportions: spacing, alignment, margins, padding.
- Match typography exactly: font family, size, weight, line height, letter spacing.
- Match colors precisely. If uncertain, extract colors from the screenshot.
- Do NOT clean up or "fix" imperfect design elements.
- Do NOT replace icons with similar ones. Recreate shapes if needed.
- Do NOT convert spacing to more standard values (e.g., 12px → 16px). Keep the exact screenshot spacing.

# ■ Layout Rules

- Preserve the exact frame size of the device unless I specify otherwise.
- Use Auto Layout only if it does NOT alter the visual appearance.
- If Auto Layout would change spacing, use absolute positioning.
- Do not reorder layers or simplify structure.
- Maintain visual hierarchy exactly as shown.

# ■ Workflow Before Generating

1. First, analyze the screenshot and output:
    - Detected UI blocks (header, content zone, lists, buttons, tab bar, etc.)
    - Key spacing values (top margins, gaps, paddings)
    - Extracted HEX colors
    - Inferred fonts (and confidence level)
2. Wait for my confirmation before generating the final Figma layout.

# ■ Output Requirements

- Recreate the layout exactly, pixel-for-pixel.
- Maintain proportions and alignment precisely.
- Keep component names simple and structural (e.g., Header / PrimaryButton).
- If anything is ambiguous, ask for clarification instead of guessing.

Respond "Ready for the screenshot" when prepared.
:::message おすすめ: AIモデルは Gemini 3 Pro を選択すると、より精度の高いデザインを生成できます。 :::
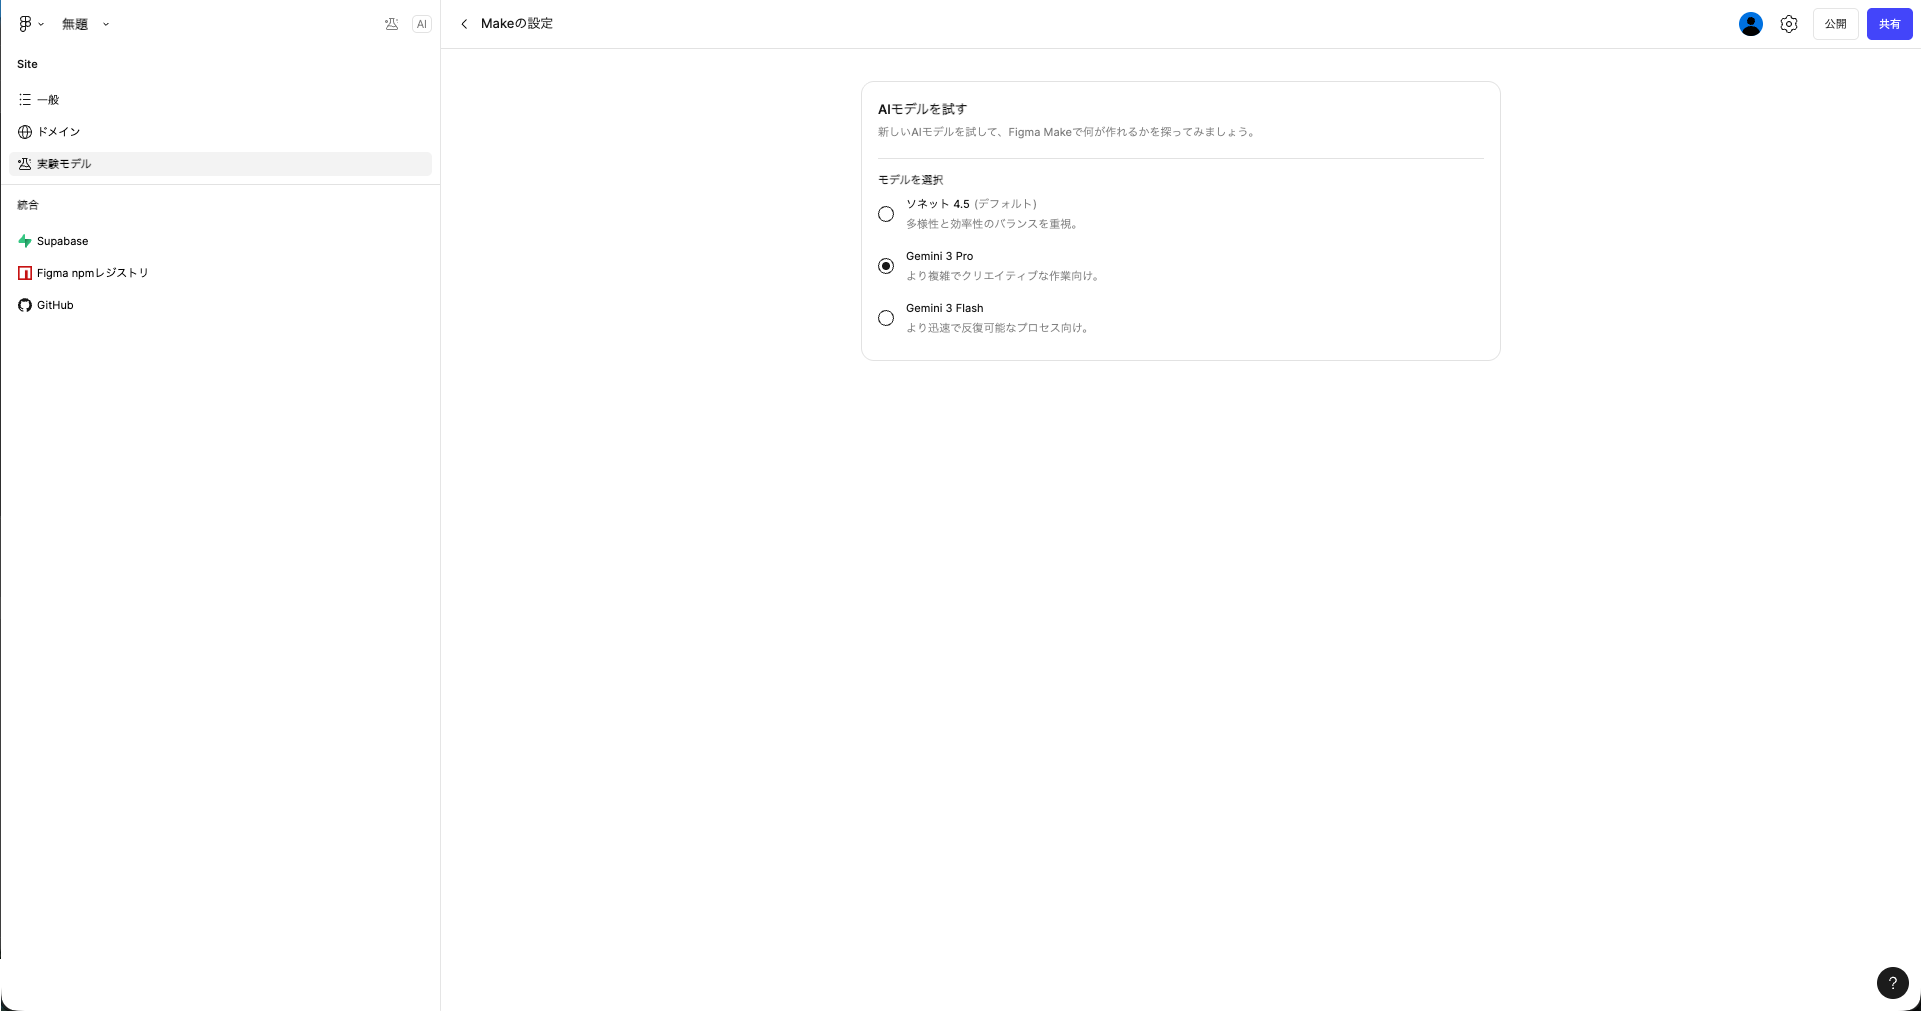 Makeの設定 > 実験モデルからGemini 3 Proを選択
ステップ2: スクリーンショットを添付してプロンプトを送信する
再現したい画面のスクリーンショットをFigma Makeにアップロードし、プロンプトを送信します。
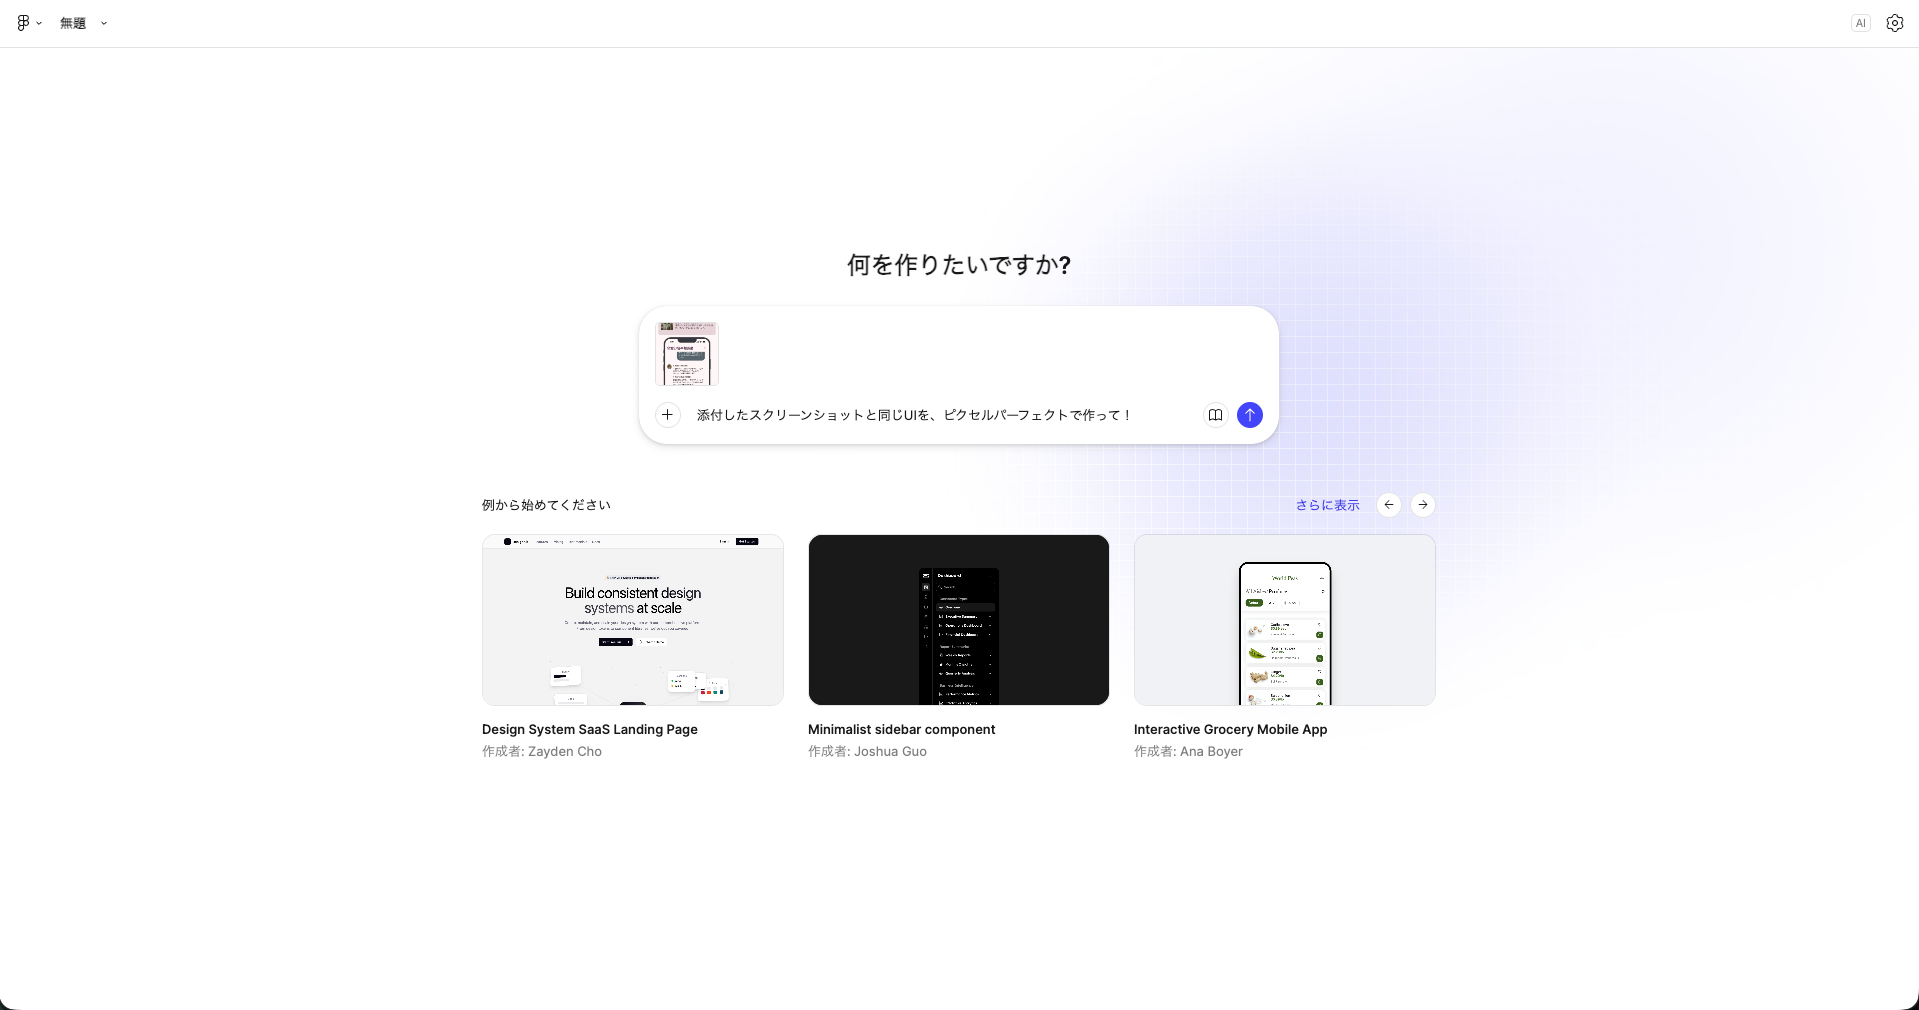 スクリーンショットを添付して、ピクセルパーフェクトで作成を依頼
添付したスクリーンショットと同じUIを、ピクセルパーフェクトで作って!Figma Makeが画面を分析し、デザインを生成してくれます。
 AIがスクリーンショットを分析してデザインを生成
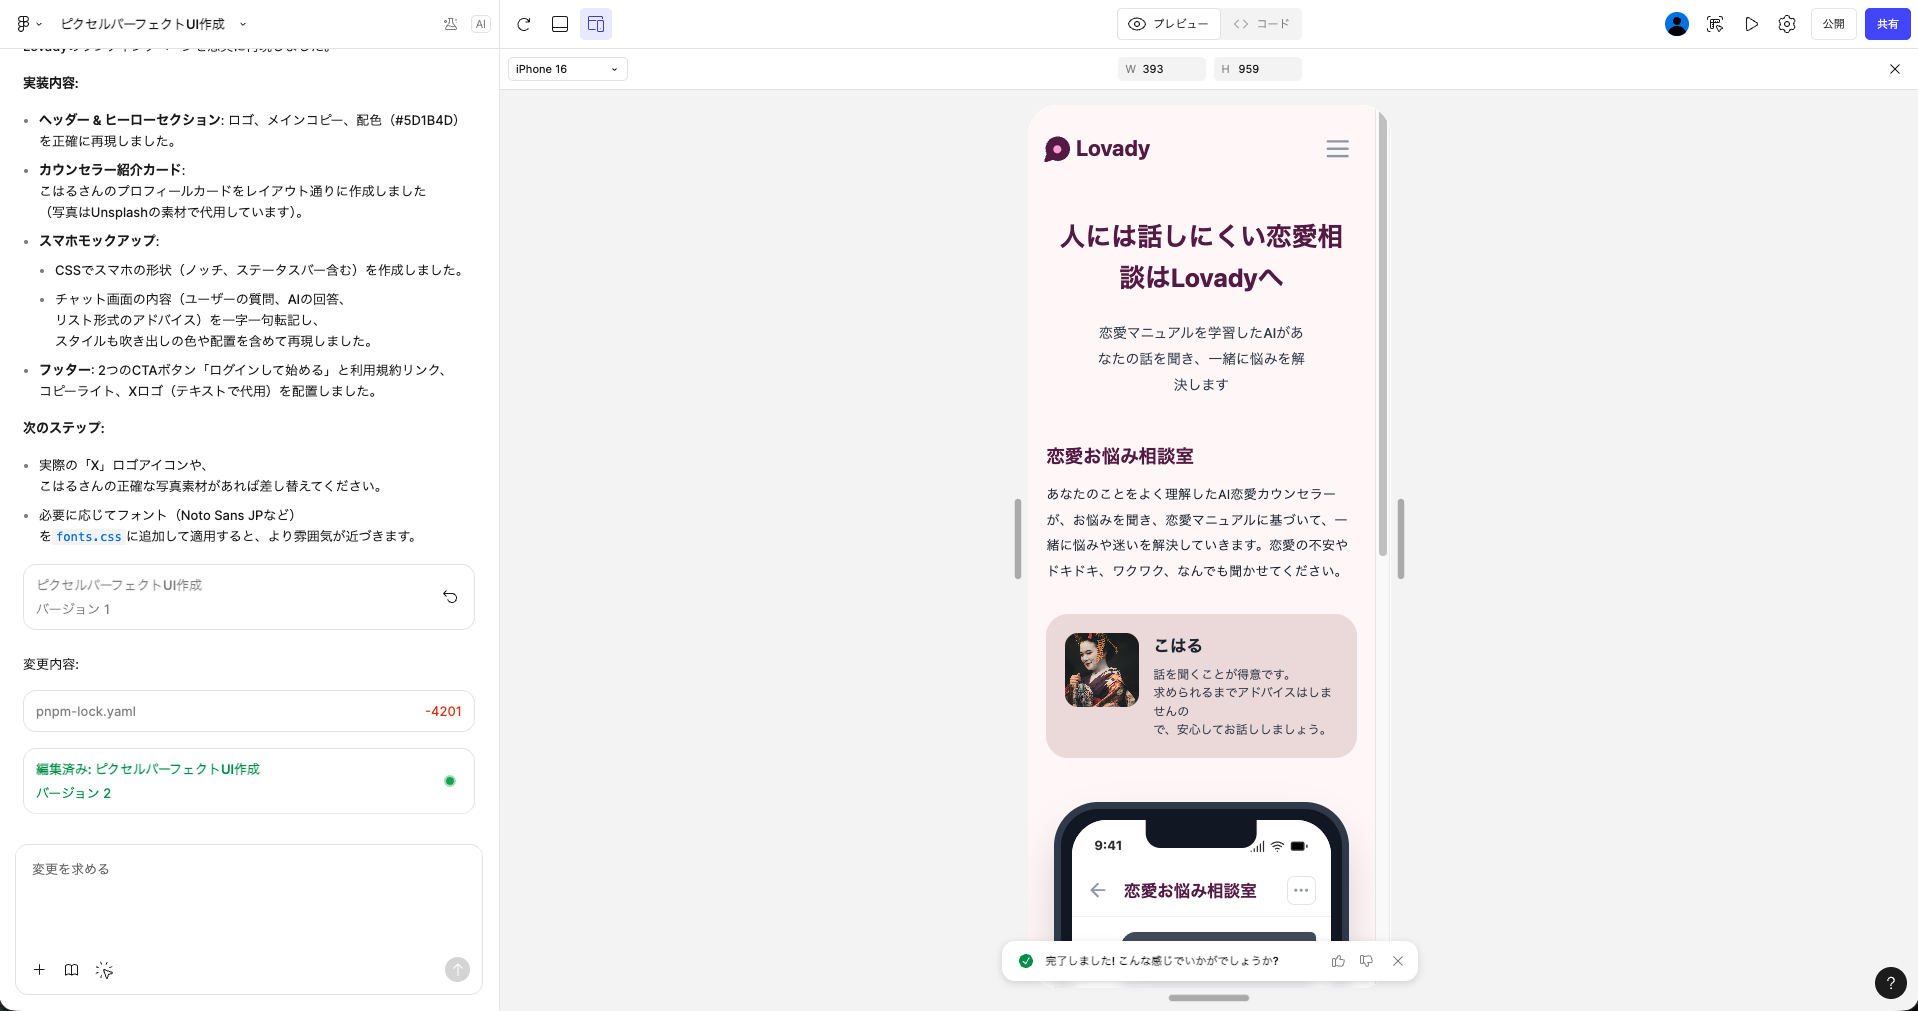
ステップ3: 作成したデザインをデザインファイルに貼り付ける
Figma Makeが生成したデザインをコピーして、デザインファイルに貼り付けます。
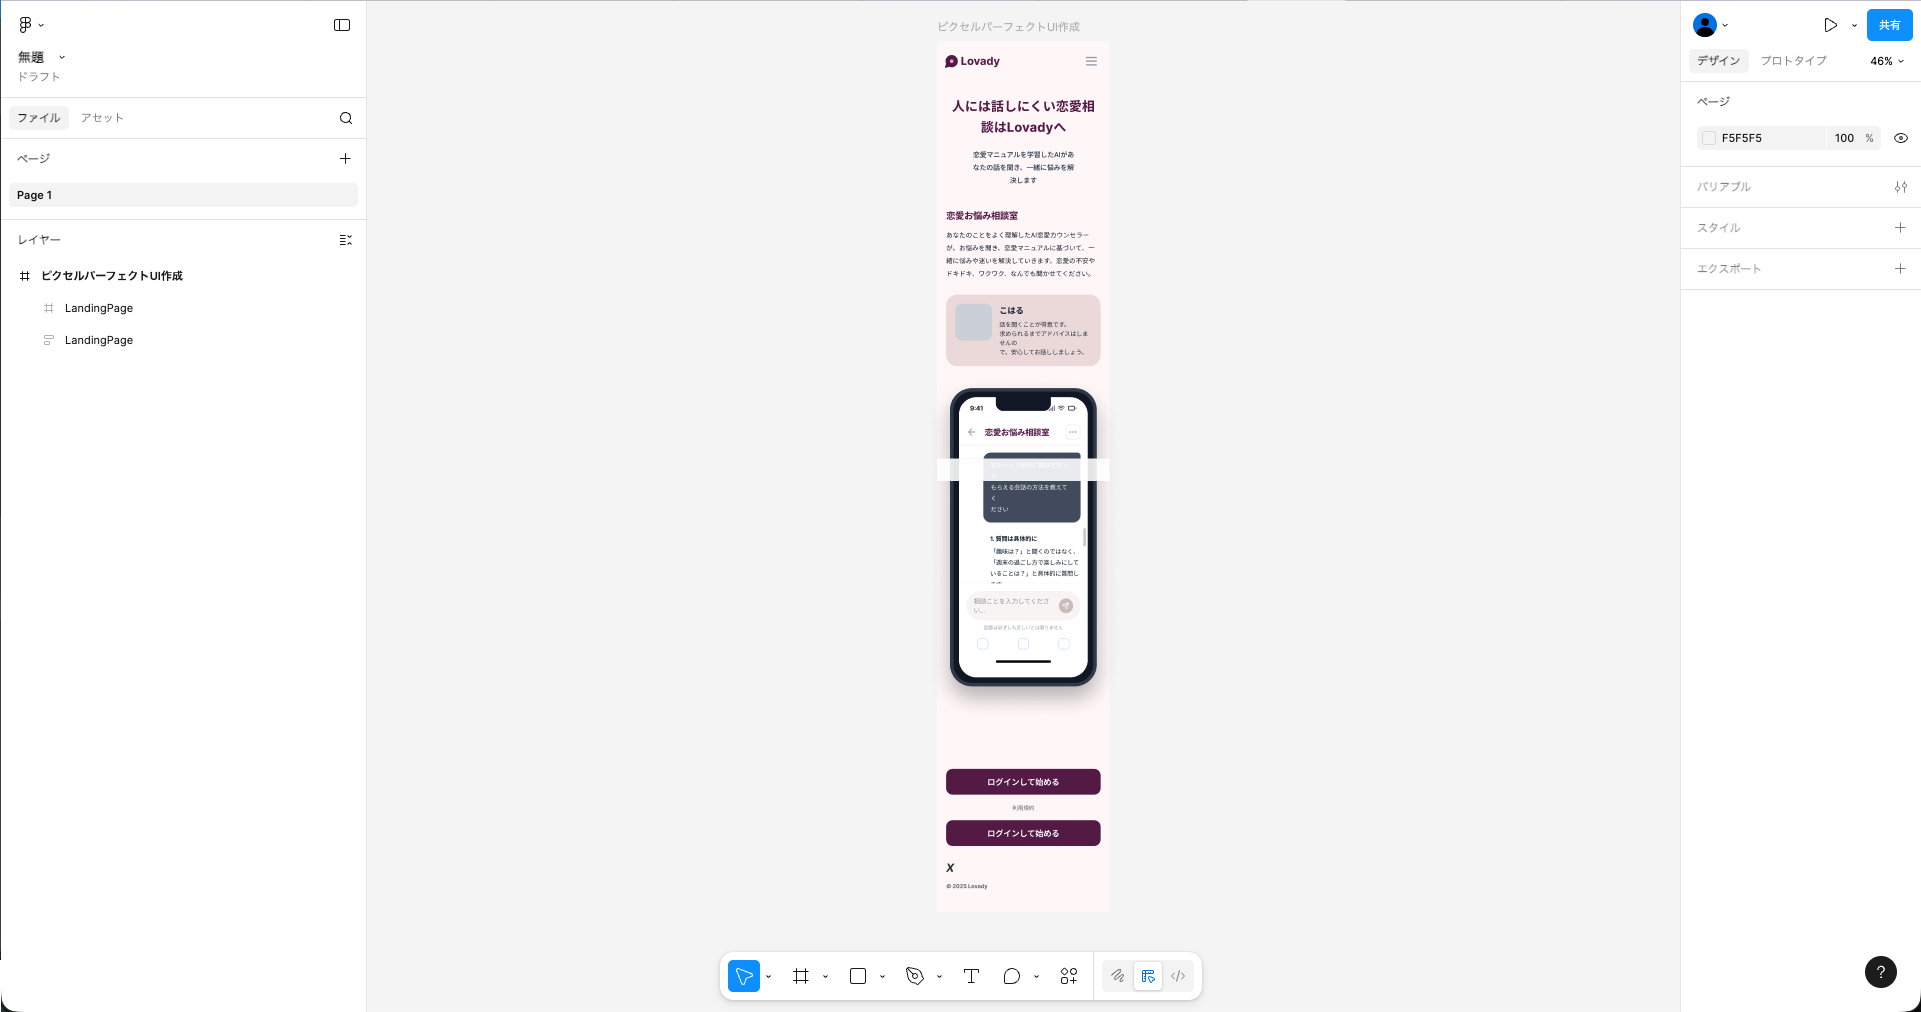 生成されたデザインをFigmaに貼り付けた状態
このプロンプトのポイント
このプロンプトが効果的な理由は、AIに「改善しないで」と明確に伝えている点です。
通常、AIはデザインを「きれいに整える」傾向があります。例えば:
- 13pxのマージンを16pxに丸める
- 似たようなアイコンに置き換える
- レイアウトを「より良く」調整する
これでは、実装と一致するデザインにはなりません。
プロンプトでは Do NOT reinterpret or improve と明確に指示することで、見た目の完全再現を優先させています。
まとめ
Figma Makeは、新規デザインを作成するだけでなく、スクリーンショットからデザインを再現するツールとしても活用できます。
このプロンプトを使えば、Figmaのメンテナンスがぐっと楽になります。ぜひ試してみてください!
他にもおすすめのFigma Makeの使い方があれば、ぜひ教えてください!
Xフォローしてくれると嬉しいです
Xでも情報発信しているので、フォローしていただけると励みになります!